To can foods safely at home, especially for preparedness and survival purposes, begin by selecting research-based recipes from reliable sources that focus on long-term storage. Gather fresh, high-quality ingredients and ensure you have clean jars and the necessary canning tools ready for use. Choose your packing method—hot or raw pack—while adhering to the recommended headspace to ensure proper sealing. For high-acid foods, utilize the boiling water bath method, paying close attention to specific processing times based on your altitude to ensure safety and effectiveness. After the jars have cooled, verify that the seals are intact and store them in a cool, dark place to extend shelf life. Mastering these canning techniques is vital for building a sustainable food supply in your preparedness efforts.
Key Takeaways
- Utilize research-based recipes from trusted survival and prepping resources to ensure safe canning practices for both high-acid and low-acid foods, aligning with your preparedness goals.
- Thoroughly clean and inspect jars, lids, and equipment to ensure they are free of defects before starting the canning process, as this is vital for long-term food storage.
- Adhere to recommended headspace requirements and processing times based on the specific food type, taking into account altitude adjustments for optimal preservation.
- After cooling, verify that seals are intact and store sealed jars in a cool, dark location, routinely checking for signs of spoilage to maintain your food supply’s integrity.
- Emphasize food safety by refrigerating any unsealed jars and labeling sealed jars with contents and preservation dates, ensuring your supplies are well-organized for future use.
Safe Canning Methods
When you’re ready to can foods as part of your survival and prepping strategy, understanding safe canning methods is crucial to ensure your preserves are both nutritious and safe to consume.
The boiling water bath method is ideal for high-acid foods like fruits and jams, ensuring a pH of 4.6 or lower. For low-acid foods, such as vegetables and meats, pressure canning is essential, as it reaches higher temperatures to eliminate harmful bacteria that could jeopardize your food supply.
Always sterilize jars properly and keep them hot to avoid breakage during the canning process. Use research-based recipes from reliable sources like the USDA or the National Center for Home Food Preservation to ensure proper sealing and to prevent foodborne illnesses, thus enhancing your self-sufficiency and preparedness.
Choosing a Recipe
Choosing the right recipe is crucial for successful canning in a survival situation, as it ensures both safety and quality of your preserved foods. Always refer to trusted sources like the USDA or the National Center for Home Food Preservation to find reliable recipes.
Make sure the recipe includes all necessary ingredients, detailed preparation steps, and accurate processing times for the specific food you’re preserving. For high-acid foods, utilize boiling water bath canning, while low-acid foods necessitate pressure canning to ensure safety.
If you’re operating at an altitude above 1,000 feet, be sure to adjust your process accordingly. Adhere strictly to the recipe, particularly concerning headspace, to prevent spoilage and ensure a proper seal.
Prioritizing food safety is essential for optimal results, especially in a prepping context where self-sufficiency is key.
Getting Ready to Can
After selecting a reliable recipe, the next step in your canning process is crucial for ensuring long-term food storage.
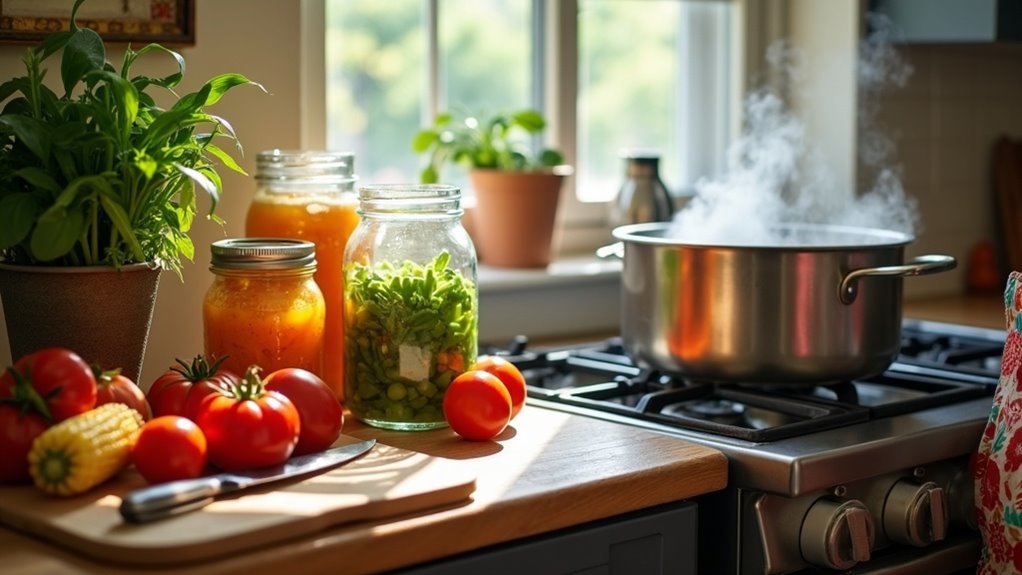
Start by assembling and thoroughly washing your jars, lids, and canning tools with a clean towel to prevent any contamination that could compromise your food supply.
Gather fresh food at peak quality, washing them thoroughly to eliminate dirt and microorganisms, which is vital for safe preservation.
Inspect jars for any defects, discarding any damaged ones to guarantee a proper seal, as this is essential for preventing spoilage.
Keep your jars in hot water before filling to prevent breakage, which is especially important in survival situations where resources may be limited.
When filling the jars, use appropriate packing methods, leaving adequate headspace and covering the food with liquid, as this is essential for effective preservation and processing time.
Proper canning techniques will contribute significantly to your preparedness and ability to sustain yourself during challenging times.
Methods of Pack
When packing food for canning in a survival situation, you can utilize either the hot pack or raw pack methods.
The hot pack method involves heating food before placing it in jars, which not only enhances flavor and color but also helps eliminate potential pathogens, making it a safer option for long-term storage.
On the other hand, the raw pack method places raw food directly in jars, allowing for a quicker process, which can be advantageous when time is of the essence during emergencies.
Regardless of the method you choose, ensure that you cover the food with sufficient liquid to guarantee proper preservation and prevent spoilage, which is crucial for maintaining your food supply in any prepping scenario.
Raw Pack Method
The raw pack method is an essential technique for survivalists and preppers, providing a simple yet effective way to can food for long-term storage. This method allows you to place raw, unheated food directly into jars before covering them with boiling liquid, ensuring that you can preserve fresh produce efficiently.
It’s particularly suited for fruits and certain vegetables, as it guarantees that air escapes and creates a vacuum seal during processing—critical for maintaining food safety in your prepper pantry.
When utilizing the raw pack method, be diligent about leaving the recommended headspace—typically 1/2 inch for fruits and 1 inch for vegetables—to accommodate any expansion during the canning process.
While you may observe some fruits floating to the top, rest assured this won’t compromise safety as long as you follow research-based recipes and guidelines.
Always prioritize proper processing temperatures and techniques to ensure effective food preservation, keeping your supplies safe and ready for any situation.
Hot Pack Method
Switching from the raw pack method, the hot pack method offers a valuable technique for canning foods, especially for those focused on enhancing the quality and safety of their preserved goods in a survival situation. By preheating food to a simmer or boil, you’ll ensure a uniform seal and significantly reduce spoilage risks—critical when you’re relying on your stored food supply. Remember to leave a headspace of 1/4 inch in your jars for expansion. After packing, process your jars immediately in a boiling water bath for the recommended time. This safe method greatly improves food preservation by minimizing microorganisms, ensuring that your food remains safe and nutritious for longer.
| Step | Action | Purpose |
|---|---|---|
| 1 | Heat food | Retain quality for survival |
| 2 | Pack in jars | Guarantee uniform seal for long-term storage |
| 3 | Leave headspace | Allow for expansion during processing |
| 4 | Process in boiling water bath | Ensure safe preservation for emergencies |
| 5 | Store canned goods | Prepare for future needs |
Liquid Requirements
Understanding liquid requirements is crucial for successful canning, especially for those focused on survivalism and prepping.
When using the hot pack method, you’ll need hot liquid to cover the food, which not only enhances color and flavor but also ensures better preservation during emergencies.
For raw packing, place raw food directly in jars and cover with boiling liquid, making sure it fills to the proper headspace—about ¼ inch for preserves and ½ to ¾ inch for whole fruits.
It’s important to refer to specific recipes for accurate liquid requirements, as different foods may need varying amounts of liquid cover.
Adhering to safe canning practices is vital for proper sealing and effective food preservation, preventing spoilage and maintaining quality in your long-term food storage plan.
Steps for Boiling Water Bath Method
To successfully use the Boiling Water Bath Method for food preservation in your survival preparations, start by gathering your essential equipment, including clean jars, lids, and a large pot of water.
Ensure that your jars are properly sterilized and filled with your chosen food items, leaving the appropriate amount of headspace to allow for expansion.
Be diligent in removing any air bubbles to prevent spoilage.
Finally, process the jars for the time specified in your recipe to guarantee safe preservation and readiness for any emergency situation.
Preparing Your Equipment
Before you begin canning, it’s crucial to prepare your equipment effectively to ensure food safety and quality, particularly in a survival or prepping context. Start by gathering your jars, two-part lids, and a large pot for boiling water. Clean all jars and lids using hot, soapy water or a dishwasher to sanitize them. Boil the jars for a few minutes, then use a jar lifter to remove them and allow them to air-dry. Check that your boiling water canner has enough water to cover the jars by at least 1 inch to ensure proper processing. Keep clean towels handy for drying jars and wiping rims, as cleanliness is vital in long-term food storage.
| Equipment | Purpose |
|---|---|
| Jars | Hold your food for storage |
| Boiling water | Sanitize jars to prevent spoilage |
| Jar lifter | Safely handle hot jars during processing |
| Clean towels | Dry jars and wipe rims for sealing |
| Water levels | Ensure safe processing for preservation |
Filling the Jars
Now that your equipment is prepared, it’s time to fill the jars for canning, an essential skill for any survivalist or prepper.
Use a wide-mouthed funnel for easy filling, ensuring you leave about ¼-inch headspace at the top to allow for expansion.
If you’re employing the hot pack method, fill the jars with hot food or boiling liquid to maintain temperature and ensure safety. For raw packed jars, simply place the raw food in the jar and cover it with boiling liquid, making sure the food remains submerged for optimal preservation.
Gently stir with a clean chopstick to remove any air bubbles, which is crucial for creating an airtight seal.
Finally, wipe the jar rims with a clean cloth to eliminate any residue before applying the lids and finger-tightening them.
This process is vital for long-term food storage, ensuring you have reliable provisions during uncertain times.
Processing Time Guidelines
Understanding and adhering to the correct processing time guidelines is crucial for safe and effective boiling water bath canning, especially for those focused on survivalism and prepping.
Processing times generally range from 5 to 85 minutes, with fruits and jams requiring less time compared to low-acid vegetables, which are vital for long-term food storage.
If you’re canning at altitudes above 1,000 feet, it’s important to add 5 minutes for every additional 1,000 feet to ensure safety and effectiveness.
Always maintain a water level at least 1 inch above the jars for optimal heat distribution.
Utilize research-based recipes that specify exact processing times to maintain food safety.
After processing, allow jars to cool undisturbed for 12-24 hours before checking for proper seals, a critical step for ensuring your food supplies are safe and ready for storage.
Safe Handling of Processed Jars
Proper handling of processed jars is crucial for ensuring food safety and quality, especially for those focused on survivalism and prepping.
After cooling your canning jars for 12-24 hours, it’s vital to check for proper seals by pressing the lid center; it should remain concave. If you discover any unsealed jars, refrigerate the contents and consume them within 2-3 days or reprocess them within 24 hours to maximize your food supply.
To prevent rusting, remove screw bands from sealed jars and store them for future use. Always label all jars with their contents and the date of preservation, and keep them in a cool, dark place to extend shelf life.
Regularly inspect your canned goods for any signs of spoilage before consumption to ensure safe handling and maintain your preparedness for any situation.