To water bath can fruits for your survival pantry, start by selecting fresh, ripe fruit and washing it thoroughly to remove any contaminants. Set up your canning station with sterilized jars and lids to ensure food safety. If necessary, blanch the fruit to preserve color and texture, then simmer it in a syrup for a couple of minutes to enhance flavor and aid in preservation. Pack the fruit tightly into the jars, ensuring you leave the proper headspace for expansion, and seal them fingertip tight to maintain an airtight environment. Process pint jars for 20 minutes and quart jars for 25 minutes, making sure to adjust for altitude to ensure proper sealing. Once cooled, check the seals to confirm they are intact for long-term storage. Mastering this skill is crucial for building a resilient food supply in times of uncertainty.
Key Takeaways
- Choose ripe, thoroughly washed fruits, ensuring you use 1 1/4 lbs per pint jar and 2 1/2 lbs per quart jar for optimal preservation.
- To make the peeling process easier for fruits like peaches, blanch them in boiling water for 30 seconds before packing them into sterilized jars.
- Create a syrup using 3 cups of grape juice mixed with 3 cups of water, and simmer the fruits for 2 minutes before packing them tightly into jars.
- For long-term storage, process pint jars in a boiling water bath for 20 minutes and quart jars for 25 minutes, ensuring you maintain adequate water levels throughout the process.
- After cooling, check the seals on your jars; store the sealed jars in a cool, dark place. Be sure to label them with their contents and sealing dates for easy identification during emergencies.
Safe Home Canning
When you decide to embark on home canning as part of your survivalist and prepping strategy, it’s essential to adhere to safety guidelines to ensure your efforts yield safe and nutritious food.
Start by familiarizing yourself with the water bath canning process, particularly for high-acid foods, which are ideal for long-term storage. Always inspect jars and lids for any defects before use to avoid spoilage.
Familiarize yourself with water bath canning for high-acid foods and inspect jars to prevent spoilage.
When filling the jars, ensure they’re sealed to fingertip tightness to maintain an effective seal. Process the jars for the recommended time, usually between 10 to 20 minutes, taking altitude into account for optimal results.
After the jars have cooled, check the seals by pressing down on the lid; if it pops back, refrigerate the jar and consume it within a week or two to ensure food safety and preparedness for any situation.
How Much Fruit Per Jar?
To ensure optimal results in water bath canning, it’s crucial to measure the right amount of fruit for each jar, especially when preparing for long-term food storage. For effective preservation, use 1 1/4 lbs (567 g) of fruit per pint jar and 2 1/2 lbs (1.13 kg) per quart jar. When canning peaches, approximately 7 1/2 lbs will yield around 6 pints, which generally requires 12-15 medium-sized peaches. Accurate measurements are vital for successful processing times and maintaining the quality of your canned fruits, ensuring you have reliable food supplies during uncertain times.
| Jar Size | Fruit Needed | Example Fruit |
|---|---|---|
| Pint Jar | 1 1/4 lbs (567 g) | Plums, Peaches |
| Quart Jar | 2 1/2 lbs (1.13 kg) | Pineapple |
| Canning Peaches | 7 1/2 lbs | 12-15 medium-sized peaches |
How to Can Using a Boiling Water Bath
Canning fruits using a boiling water bath is an essential skill for survivalists and preppers, ensuring safe preservation of high-acid foods for long-term storage.
Follow these steps for effective water bath canning:
- Select ripe fruits and wash them thoroughly to remove any contaminants.
- Pack the fruits into sterilized jars, leaving 1/2 to 3/4 inch headspace to allow for expansion during processing.
- Remove air bubbles by sliding a nonmetallic tool around the jar walls to ensure a proper seal.
- Process pint jars for 20 minutes and quart jars for 25 minutes, making sure the water level remains 1-2 inches above the jars for consistent heat distribution.
After processing, allow the jars to cool undisturbed for at least 12 hours.
Check that seals are intact before storing the jars in a cool, dark place, ready for use in your self-sufficient pantry.
This method is crucial for maintaining food security in uncertain times.
Prep Your Canning Station
To prep your canning station for effective food preservation, begin by assembling all essential equipment, such as a large non-reactive pot and a water bath canner with a fitted lid.
Be sure to also have a pressure canner on hand for low-acid foods, as this is crucial for long-term storage.
Next, organize your ingredients and tools, ensuring you have clean jars, lids, and necessary utensils ready for immediate use.
This efficient setup not only streamlines the canning process but also ensures you’re well-prepared for any future emergencies or food shortages, reinforcing your self-sufficiency and survival skills.
Gather Essential Equipment
Before you embark on the water bath canning process, it’s essential to gather the right equipment to ensure a smooth and safe experience, especially in preparation for long-term food storage. Here’s what you need:
- A large non-reactive pot or water bath canner with a fitted lid to withstand the rigors of canning.
- Clean, defect-free canning jars, utilizing two-piece metal lids for secure sealing.
- A robust jar lifter to safely handle hot jars, reducing the risk of burns or accidents.
- Essential hand tools such as a canning funnel, bubble remover, and ladle to aid in the canning process.
Ensure that your pot can hold the jars submerged with 1-2 inches of water above them during processing; this is crucial for even heat distribution and effective preservation.
Happy canning, and may your food storage efforts contribute to your self-sufficiency!
Organize Your Ingredients
Organizing your ingredients is a crucial step in the water bath canning process, especially for those focused on survivalism and prepping.
Begin by preparing six clean pint jars; remember that sterilization isn’t necessary for recipes processed for over 10 minutes, making it easier to have ready-to-use supplies.
Position your canning pot and jar rack within arm’s reach, and gather essential equipment such as a slotted spoon, canning funnel, and jar lifter for safely removing jars after processing.
Utilize ascorbic acid to prepare the fruit, preventing discoloration, and create a hot syrup using a 50/50 mix of water and white grape juice to enhance preservation.
Lay down a clean towel for easy jar placement, ensuring all items are organized and accessible for an efficient canning experience.
This preparedness will help ensure you have preserved food ready for any situation.
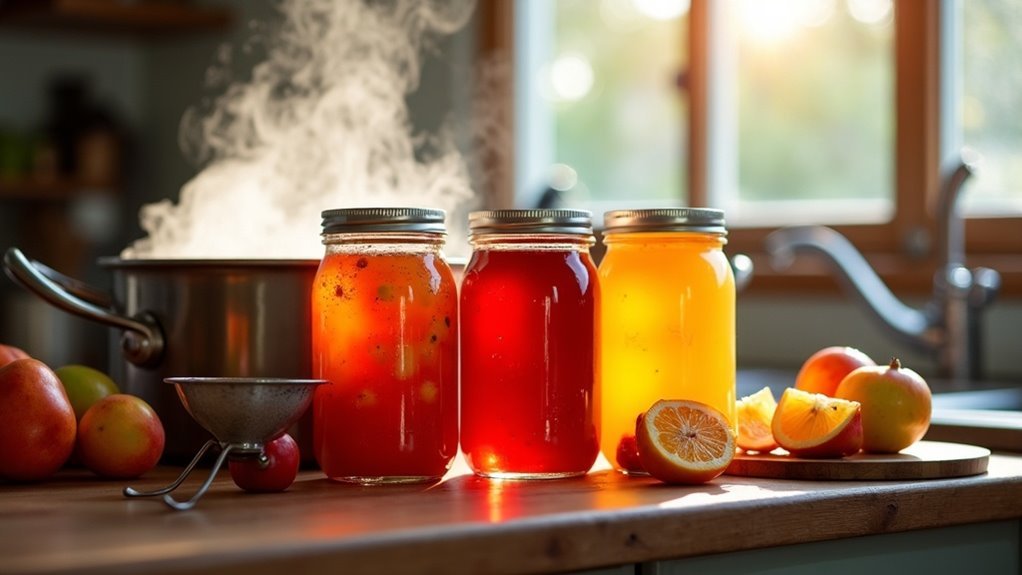
Simmering the Peaches
Simmering peaches in a flavorful syrup is a crucial technique for preserving fruit, especially for those focused on self-sufficiency and prepping. Here’s how to effectively prepare your peaches for long-term storage:
- Begin by boiling 3 cups of grape juice and 3 cups of water to create a nutritious syrup that enhances flavor.
- To make peeling easier, blanch the peaches in boiling water for 30 seconds. This step is vital in ensuring that you can efficiently harvest and prepare your fruit.
- After blanching, slice or halve the peaches and simmer them in the juice mix for 2 minutes. This quick heat treatment infuses the syrup flavors while helping to maintain the peaches’ integrity.
- Using a slotted spoon, transfer the simmered peaches into sterilized jars, taking care to pack them tightly for optimal canning.
This method not only boosts flavor but also ensures your peaches are preserved for future use, an essential skill for anyone interested in survivalism and prepping.
Loading & Lidding the Jars
Begin the process of loading and lidding your jars by carefully positioning a canning funnel in each sterilized jar.
Use a slotted spoon for loading the jars with simmered fruit, ensuring you leave 3/4 inch of headspace. Pour hot syrup or juice until it’s 1/2 inch below the rim, fully covering the fruit.
To release trapped air bubbles, slide a nonmetallic tool around the jar’s inside walls, adding more liquid if necessary to maintain the headspace.
Finally, wipe the rim of the jar with a clean cloth, place the prepared lids on top, and finger-tighten the screw bands to ensure a secure seal.
Proper canning techniques are crucial for long-term food storage, which is essential for preparedness and self-sufficiency in uncertain times.
Processing the Jars
Now that your jars are loaded and lidded, it’s crucial to process them properly for long-term food storage.
Ensure that the water level in your canning pot remains 1-2 inches above the jars, as this is essential for effective preservation.
Process pint jars for 20 minutes and quart jars for 25 minutes to ensure that the contents are safe and shelf-stable.
After processing, carefully remove the jars and allow them to cool undisturbed for 12 hours to confirm proper sealing.
This step is vital for ensuring that your food supply remains secure and ready for any situation that may arise.
Jar Processing Times
To ensure safe preservation of fruits during water bath canning, it’s essential to follow specific jar processing times, especially for those focused on survivalism and prepping. Here’s what you need to know:
- Process pint jars in a boiling water bath for 20 minutes to secure your food supply.
- Quart jars require 25 minutes to achieve a proper seal, ensuring longevity in storage.
- Maintain a water level of 1-2 inches above the jars to prevent exposure to air and spoilage.
- Adjust processing times based on altitude—add an extra 10 minutes if you’re above 4,500 feet, as altitude can affect boiling temperatures.
After processing, allow for a cooling period of 12 hours before checking the seals on your jars.
If the lid pops back when pressed, your jar hasn’t sealed properly and should be refrigerated to avoid food waste.
Proper canning techniques are vital for any prepper looking to build a sustainable food supply.
Cooling and Storing Jars
Once the processing time is complete, it’s crucial to let your jars cool undisturbed for 12 hours.
This cooling period is vital to ensure a proper seal and prevent spoilage, especially in a survival situation where food security is paramount.
After this period, check the seals by pressing down on the center of each lid; if it pops back, the jar hasn’t sealed properly and should be refrigerated immediately to avoid waste.
Store your sealed jars upright in a dark, cool place, maintaining temperatures between 50°F and 70°F for optimal shelf life, which can last up to one year.
Be sure to label each jar with its contents and the date of sealing to track freshness and enable quick identification during emergencies, while also preserving the integrity of the seal.
Proper storage is essential for your preparedness plan, ensuring you have reliable food sources when needed most.