To ensure the safety and quality of your stored water, it’s crucial to rotate it every 6 to 12 months. Regularly check for signs of contamination, such as cloudiness or foul odors, which could indicate spoilage. Always store your water in opaque, food-grade containers placed in cool, dark locations, and keep them tightly sealed to prevent contamination. Before refilling, make sure to clean your containers with mild soap and unscented bleach to eliminate any potential bacteria. For those looking to extend the shelf life of their water supply, consider the use of water preservatives. By adhering to these best practices, you can maintain a reliable supply of clean water for your survival needs, and there’s more critical information coming up to help you prepare effectively.
Key Takeaways
- Rotate your stored water every 6 to 12 months to ensure it remains safe and of high quality for survival situations.
- Regularly check bottled water for expiration dates and any signs of contamination to avoid potential health risks.
- Use opaque, food-grade containers for water storage and keep them in cool, dark locations to protect against degradation.
- Thoroughly clean containers with soap and sanitize them using a bleach solution before refilling to prevent contamination.
- Repurpose rotated water for irrigation, cleaning, or other non-drinking uses to enhance self-sufficiency and promote sustainability within your prepping strategies.
Why Should You Rotate Water Storage?
When it comes to emergency preparedness, storing water is a critical component, and regularly rotating your water supply is essential for ensuring its safety and quality.
By rotating your stored water every 6-12 months, you can prevent the growth of bacteria and algae, ensuring that you have clean, safe drinking water when you need it the most.
If you opt for store-bought bottled water, it’s important to check expiration dates to mitigate health risks, particularly for vulnerable populations like children.
Conducting regular inspections can help you spot signs of contamination, such as cloudiness or unpleasant odors.
By properly rotating and treating your water, you can extend its shelf life, thereby enhancing your overall emergency preparedness.
How Often Should You Rotate Water Storage?
Rotating your water storage every 6 to 12 months is crucial for ensuring its safety and quality, especially in the context of survivalism and prepping.
While properly treated water can last indefinitely, regular rotation minimizes the risk of contamination and ensures that your emergency supply remains viable.
If you’re relying on bottled water, always check the expiration date; this is particularly important due to potential health risks associated with BPA in plastic containers.
Ideally, strive to rotate your water supply annually, unless you’ve added specific preservatives designed to extend shelf life.
By following these guidelines, you can effectively manage your water reserves and ensure they’re safe for consumption when the need arises.
Being prepared means not only having water stored but also maintaining its quality for when it matters most.
Signs Your Water May Need Rotation
It’s crucial for survivalists and preppers to recognize the signs that your stored water may need rotation to ensure its safety and drinkability.
If you observe any of the following indicators, it’s time to assess your water supply and consider replacing it:
- Build-up around the container edges, which could indicate potential contamination
- Signs of bacteria growth or algae, signaling that the water is unsafe for consumption
- A cloudy appearance, a strong indication of spoilage that shouldn’t be ignored
- A foul smell emanating from the water supply, a definitive sign of quality degradation
Conducting regular checks every 6-12 months can help you maintain a reliable and safe water supply for emergencies.
Don’t overlook these critical signs in your preparedness efforts!
How to Preserve Your Water Storage
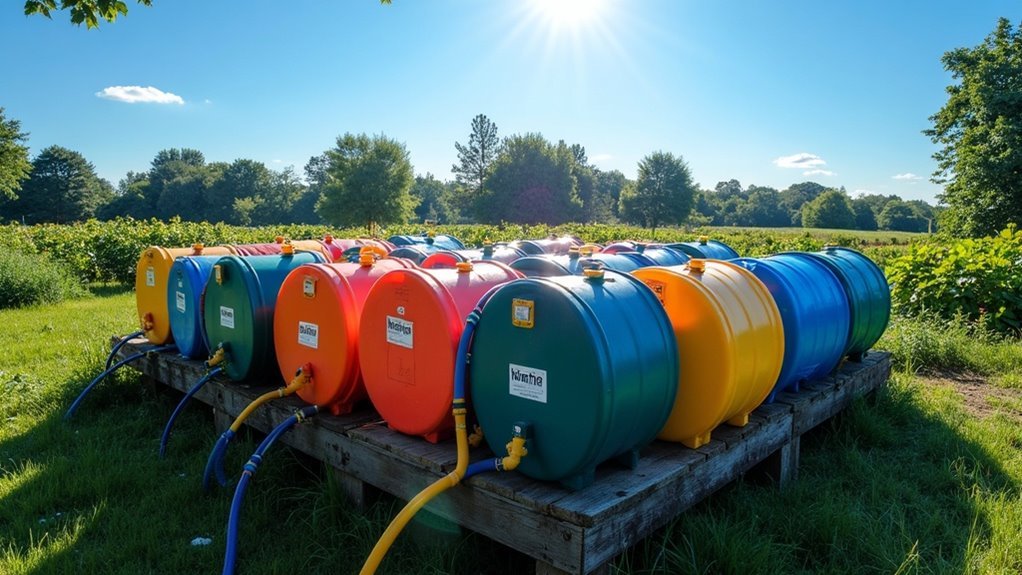
To effectively preserve your water storage for survival situations, use opaque containers like green or blue bottles to limit light exposure, as this can prevent algae growth.
Store your water in cool, dark locations such as basements or closets to maintain its quality, safeguarding it from heat and sunlight.
Regularly inspecting your storage conditions ensures that your water remains safe, uncontaminated, and ready for use when you need it most.
Prioritizing proper water storage techniques is essential for any prepper looking to be self-sufficient in emergencies.
Use Opaque Containers
Using opaque containers is crucial for effective water storage in survival situations. These containers minimize light exposure, which helps prevent algae and bacteria growth, ensuring you maintain good water quality during emergencies.
When selecting opaque containers for your prepping needs, keep these points in mind:
- Choose food-grade materials specifically designed for long-term water storage.
- Regularly inspect containers to ensure they’re sealed and undamaged to prevent contamination.
- Opt for colors like green or blue to effectively block light and protect your water supply.
- Avoid clear plastics to prevent potential chemical leaching, which could compromise your water safety.
Store in Cool Locations
After selecting opaque containers for your water storage, the next step is to choose the right environment to ensure the quality of your supply.
Store your emergency water in cool, dark locations such as basements or closets to prevent degradation. Regularly monitor the temperature of your storage area, as heat can encourage bacterial growth, jeopardizing safety.
Ensure that containers are tightly sealed to minimize the risk of airborne contaminants. Additionally, consider using water preservatives or chlorine additives to extend the shelf life of your stored water.
This meticulous approach to water storage is crucial for a successful preparedness plan, ensuring you’re ready for any emergency situation.
How to Clean Your Water Container or Tank
To effectively clean your water container or tank for survival purposes, gather mild soap, a scratch pad, unscented bleach, and clean water.
Begin by thoroughly scrubbing the container, focusing on hard-to-reach areas where contaminants may linger. Rinse the container completely to eliminate any soap residue.
After cleaning, it’s crucial to sanitize the container using a bleach solution; allow it to sit for 30 minutes to ensure all potential pathogens are neutralized.
Finish by rinsing the container again for maximum safety, ensuring it’s ready for safe water storage in your prepping supplies.
Cleaning Supplies Needed
When it comes to cleaning your water container or tank, having the right supplies is essential for ensuring safe and effective sanitation, especially in a survival situation.
You’ll need these cleaning supplies for a thorough cleaning process:
- Mild soap for effective residue removal, ensuring that contaminants are eliminated.
- A scrub brush or scratch pad for reaching those hard-to-clean areas that may harbor bacteria.
- Fresh water for rinsing, to guarantee that no soap remains and the water is safe for consumption.
- A spacious, open area to conduct cleaning, minimizing the risk of contamination from external sources.
These items are crucial for maintaining the quality of the water you store for emergencies.
Steps for Effective Cleaning
Cleaning your water container or tank is crucial for ensuring the safety and quality of your stored water, especially for survival situations. Follow these steps for effective cleaning:
| Step | Action | Purpose |
|---|---|---|
| 1. Prepare | Clean in a spacious, open area | Prevent contamination and ensure a safe workspace for your survival supplies |
| 2. Wash | Use a mild soap and water solution | Remove residues and contaminants that could affect your water quality |
| 3. Scrub | Utilize a scratch pad for hard-to-reach areas | Guarantee thorough cleaning to ensure your water source is safe for drinking |
| 4. Rinse & Inspect | Rinse thoroughly, then inspect for leaks | Maintain storage integrity and ensure your water supply is secure for emergencies |
How to Treat Your Water Storage
Effective treatment of your water storage is crucial for ensuring its safety and longevity in a survival situation.
Effective management of your water storage is essential for safety and durability in survival scenarios.
To maintain high-quality water, especially during emergencies or extended periods of prep, consider these methods:
- Add 1/8 teaspoon of unscented household bleach per gallon to eliminate harmful bacteria and pathogens.
- Utilize water preservative drops to extend shelf life, keeping your water fresh for up to five years—an important factor for long-term preparedness.
- Sterilize your containers with a mild bleach solution before filling them to prevent contamination.
- Regularly inspect the seals on your containers to minimize the risk of contamination and ensure your water supply remains secure.
What to Do With Rotated Water
Maintaining your water storage not only ensures safety but also provides practical uses for rotated water, which is crucial for survivalism and prepping. By efficiently rotating your water supply, you can be confident in your ability to repurpose gallons of water effectively during emergencies. Here are several ways to utilize that rotated water:
| Use Case | Benefits | Considerations |
|---|---|---|
| Irrigation | Keeps your survival garden thriving | Ensure plants are suitable for use |
| Toilet Flushing | Lowers household water consumption | Do not use for drinking or cooking |
| Laundry | Conserves fresh water for essential needs | Use only safe, filtered water |