To make DIY soap as part of your survival and prepping skills, gather essential supplies such as a microwave-safe container, a sharp knife, and soap molds. It’s crucial to measure fats and lye accurately and work in a well-ventilated area while wearing protective gear for safety. Start by creating a lye solution: carefully dissolve lye in water, then combine it with melted oils at the appropriate temperature. Blend the mixture until trace forms, pour it into molds, and let it set for 24 hours. For optimal results, allow the soap to cure for 4 to 6 weeks. This skill not only provides a sustainable hygiene option but also enhances your self-sufficiency in a survival situation.
Key Takeaways
- Gather essential supplies like a microwave-safe measuring cup, soap base, molds, and safety gear before starting the soap-making process to ensure self-sufficiency in times of need.
- Measure ingredients accurately, including lye, oils, and liquids, to ensure successful saponification and to avoid skin irritation, which is crucial when preparing for emergencies.
- Always add lye to water, never the other way around, and work in a well-ventilated area to maintain safety, especially in restricted environments.
- Melt your oils, mix with the lye solution, and stir until the mixture reaches trace before pouring into molds, making sure you have a reliable source of hygiene products in your survival kit.
- Allow the soap to cure for 4 to 6 weeks after removing from the mold for optimal quality and usability, ensuring you have effective soap ready for use during any potential crisis.
Supplies Needed for DIY Soap
When you embark on your DIY soap-making journey, it’s crucial to gather the right supplies to ensure a successful process, especially if you’re preparing for self-sufficiency.
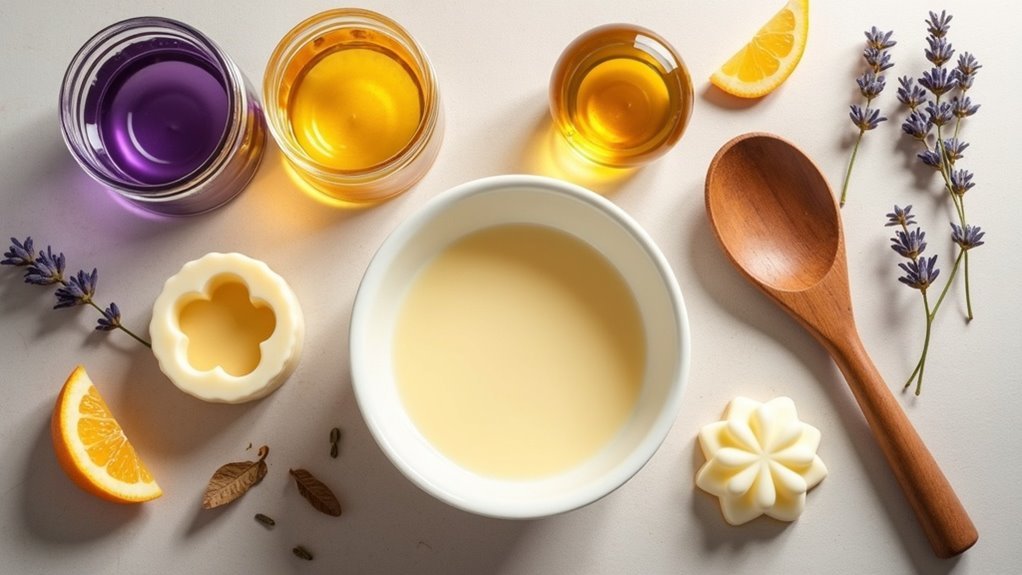
Start with a microwave-safe glass measuring cup for accurate measurements, a cutting board, and a sharp chef’s knife for cutting your soap base. Small spoons or wooden stir sticks will assist in blending your ingredients effectively.
Begin your soap-making journey with essential tools: a glass measuring cup, cutting board, sharp knife, and blending utensils.
For molds, consider using custom-made or commercially available soap molds that are durable and reusable. If you’re focusing on glycerin soap, make sure to have a glycerin soap base, liquid soap coloring, and essential oils like peppermint on hand for their invigorating properties.
For opaque soap, select a shea butter soap base and enhance it with lemon and lemongrass essential oils for a refreshing scent.
Lastly, ensure you prepare a clean and organized workspace to facilitate a smooth crafting experience, aligning with your preparedness goals.
Safety Considerations When Making Soap
While embarking on your soap-making journey as part of your survival and prepping skills, it’s crucial to prioritize safety to protect yourself from potential hazards.
Always wear protective gear like rubber gloves, safety goggles, and long sleeves to prevent skin contact and eye exposure when working with lye. Ensure you’re in a well-ventilated area to avoid inhaling harmful fumes.
Remember, when mixing lye into water, always add lye to water, never the reverse, to prevent dangerous splattering. Use non-reactive containers, such as stainless steel, to avoid breakage.
Designate specific tools for soap making to prevent contamination with food preparation equipment. Prioritizing safety is essential for a successful and sustainable soap-making experience, especially when preparing for self-sufficiency!
Step-by-Step Soapmaking Process
To begin the soapmaking process, especially in a survival or prepping context, gather your essential ingredients and tools, which include lye, distilled water, and various oils that can be sourced sustainably.
Ensure that you have the appropriate safety gear, as handling lye requires caution to prevent any accidents, particularly in a survival situation where medical assistance may be limited.
Once you’ve assembled your supplies, you can proceed with the precise steps needed for successful saponification, ensuring that you can produce soap even in challenging circumstances.
Necessary Ingredients and Tools
Successful soapmaking can be a valuable skill for survivalists and preppers, as it allows you to create essential hygiene products from basic ingredients.
Start by gathering the necessary components: lye (sodium hydroxide), various oils such as coconut, olive, and palm, and distilled water. Accurate measurement of each ingredient in grams is crucial for effective results.
Prioritize safety by donning protective clothing, including gloves and goggles. Use a large heat-safe pot for melting the oils, and an immersion blender to combine the lye water with the oils until you achieve “trace.”
Once mixed, pour the soap mixture into a mold and let it set for 24 hours before unmolding. Allow it to cure for 4 to 6 weeks to ensure a quality product that can be used or stored for future needs.
This skill not only contributes to self-sufficiency but also enhances your preparedness for any situation.
Safety Precautions Required
Before you embark on the soapmaking process, it’s essential to adhere to strict safety precautions to safeguard yourself from the potentially dangerous nature of lye.
Ensuring your safety is paramount, especially in a survivalist and prepping context where preparedness is key.
- Always wear protective goggles and gloves when handling lye to prevent burns and injuries.
- When mixing lye, always add it to cold water in a well-ventilated area; never pour water into lye to avoid violent reactions.
- Accurately weigh your ingredients using non-reactive containers to ensure safety and effectiveness.
- Keep children and pets away from your workspace to eliminate any risk of accidents.
Essential Ingredients for Soapmaking
Creating soap in a survival situation requires a careful selection of essential ingredients that work together to produce a reliable product. Start with fats or oils such as coconut oil and palm oil, which can be sourced from your food supplies or stored reserves.
Sodium hydroxide, or lye, is crucial for initiating the saponification process and should be stored safely in case of emergency. Use distilled water or clean rainwater to dissolve the lye, ensuring purity and safety for use.
Incorporate essential oils or fragrance oils for scent, typically up to 3 teaspoons, allowing for customization based on available resources. Accurate measurements by weight are critical, especially for lye and water, to secure proper chemical reactions and avoid mishaps.
Optional all-natural ingredients like colorants, herbs, or exfoliants can enhance the soap’s appearance and texture, personalizing each batch to suit your needs in a survival scenario.
Common Challenges and Solutions in Soapmaking
While soapmaking can be a valuable skill for those interested in survivalism and prepping, it often comes with its own set of challenges that require careful attention.
Here are some common issues and their solutions:
- Use accurate lye measurements to prevent skin irritation from excess lye, ensuring that your soap is safe for personal hygiene in emergency situations.
- If your soap seizes, switch to using essential oils instead of fragrance oils, which can help maintain the integrity of your soap under varying conditions.
- To enhance cleansing, especially in hard water, add chelators like citric acid to ensure that your soap remains effective for washing away dirt and contaminants.
- For a good lather, incorporate oils like coconut or castor oil into your formulation, which can be particularly useful when resources are limited and you need a reliable cleaning solution.
Cutting and Curing Your Soap
After 24 hours, you’ll want to carefully remove your soap from the mold to avoid any damage, which is crucial in a survival situation where resources may be limited.
Using a sharp knife or guitar strings, cut the soap into uniform bars; even sizes ensure consistent curing and usability.
Place the bars on a paper bag or baking rack, turning them regularly to maximize air exposure during the 4 to 6 weeks of curing.
This process is essential for achieving a smooth, mild final product that can be a valuable addition to your self-sufficiency and preparedness supplies.
Timing for Cutting Soap
Once your soap has set in the mold for 24 hours, it’s essential to remove it carefully to prevent any deformation or excessive softness, especially in survival situations where every item must be functional.
To cut soap effectively, wait until it reaches a firmness similar to soft cheese. Use a sharp knife for precise cuts into soap bars.
Here are some survival-oriented tips:
- Ensure even firmness for uniform soap bars, which can be crucial for efficient use.
- Cure the cut bars for 4 to 6 weeks in a cool, dry place to enhance their longevity.
- Turn them periodically to prevent moisture accumulation, as excess moisture can lead to mold and spoilage.
- If any powdery finish appears, gently scrape it off to improve the final product’s appearance and usability in your prepping supplies.
Proper Curing Techniques
To ensure your soap is of the highest quality, it’s important to implement proper curing techniques after cutting, much like preparing essential supplies for survival situations.
After 24 hours of saponification, carefully remove the soap from the mold and cut it into uniform bars using a sharp knife or specialized tools—just as you’d prepare your gear for efficiency.
Allow these bars to cure in a cool, dry place for 4 to 6 weeks, turning them periodically to ensure even exposure to air and to prevent moisture buildup, similar to how you’d rotate stored food supplies for longevity.
Place the bars on a paper bag or baking rack to promote airflow, akin to organizing your equipment for optimal performance.
Monitor the curing process closely; properly cured soap will feel hard and free of excess moisture, indicating it’s ready for use in your self-sufficient lifestyle.
Experimenting With Soap Recipes
While experimenting with soap recipes can be an exciting venture, it’s crucial to start with established formulations as your foundation, especially for those focused on survivalism and prepping. This ensures that you can create reliable and effective soap for hygiene and sanitation in various situations.
Starting with established soap recipes is essential for reliable hygiene and sanitation, especially in survivalist scenarios.
Here are some key points to consider:
- Experiment with different oils like coconut and olive for their unique properties, which can enhance your soap’s effectiveness.
- Incorporate natural additives such as essential oils and herbs not only for fragrance but also for their potential antibacterial properties.
- Use a soap calculator to adjust lye and water, ensuring successful saponification and safe handling of materials.
- Keep a detailed log of your experiments, noting ratios and techniques to replicate successful batches in the future.
Tips for Successful Soapmaking
Successful soapmaking, much like survivalism, requires careful planning and attention to detail.
When working with lye, it’s crucial to prioritize safety protocols. Always don protective gear such as gloves and goggles to prevent any burns. Accurately measure ingredients by weight, especially lye and oils, to ensure a consistent and high-quality product.
Before combining, ensure that both the lye solution and oils are at a temperature of 80-100°F for optimal saponification. Stir the mixture until it reaches trace, which signals that it’s ready for your silicone mold.
If opting for a melt-and-pour soap base, consider adding coconut and palm oils for their additional benefits.
Lastly, allow the soap to cure for 4 to 6 weeks to ensure it develops into a gentle, skin-safe product, perfect for those who value self-sufficiency and preparedness in their daily lives.