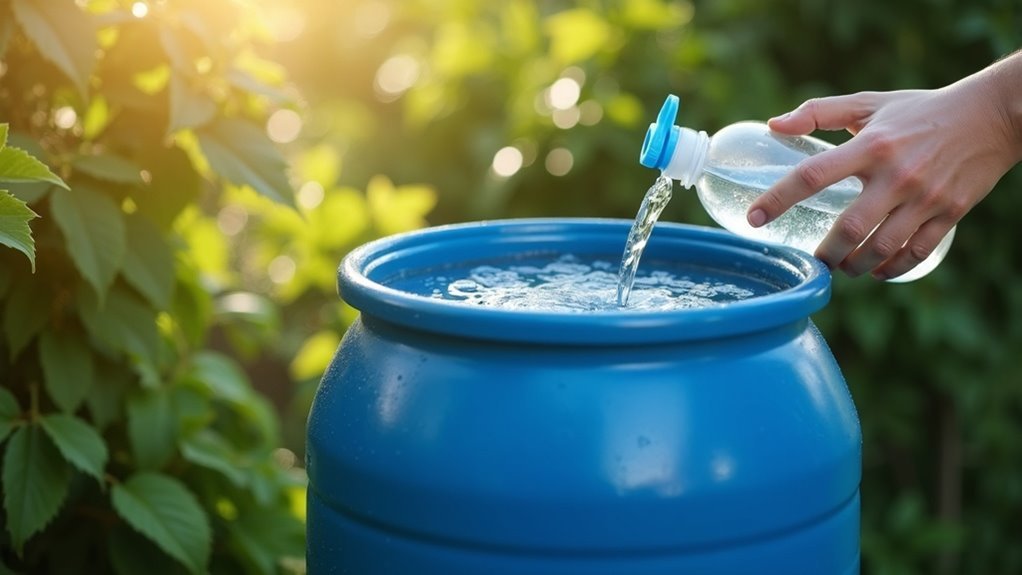
To sanitize water barrels for your survival needs, begin by thoroughly emptying and rinsing them to eliminate any debris. Create a sanitizing solution using 1/8 teaspoon of unscented bleach per gallon of water, or for a 55-gallon barrel, use 1 ounce of bleach. Scrub all surfaces inside the barrel diligently to ensure complete sanitation. Allow the bleach solution to sit for 24 hours before rinsing it out completely. It’s crucial to regularly clean and inspect your barrels to maintain optimal water quality for emergency situations. By following these practices, you can ensure safe drinking water for your preparedness plans, and there are additional guidelines available to further enhance your water storage strategies.
Key Takeaways
- Begin by emptying the water barrel and rinsing the interior with clean water to eliminate any loose debris and contaminants that could compromise your water supply.
- Prepare a 3% bleach solution by adding 1/8 teaspoon of bleach per gallon of water, or for a larger 55-gallon barrel, use 1 ounce of bleach. This will help ensure your water is safe for use during emergencies.
- After applying the cleaning solution, scrub all surfaces of the barrel using a sturdy broom or brush, and consider using a mixture of vinegar and baking soda for added cleaning power.
- Rinse the barrel thoroughly with clean water to remove any residue from the cleaning agents, and allow it to dry completely in a well-ventilated area before refilling.
- Once the barrel is disinfected, let the water sit for at least 24 hours before using it for irrigation or drinking, to ensure any remaining bacteria or contaminants are neutralized and your water supply is safe.
Importance of Sanitizing Water Barrels
Sanitizing water barrels is crucial for survivalists and preppers, as failing to maintain them can lead to the growth of harmful pathogens, posing serious health risks.
Over time, organic debris and other contaminants can build up, making regular sanitization essential for ensuring the quality of your water supply.
Utilizing a 3% bleach solution effectively disinfects the surfaces of your barrels, eliminating bacteria, viruses, and fungi that could compromise your stored water.
A 3% bleach solution disinfects your barrels, removing harmful pathogens and ensuring safe water storage.
This method not only secures safe water storage for emergencies but also enhances its usability for daily needs.
Remember to wait 24 hours after adding bleach to allow the chlorine to dissipate, ensuring the water is safe for irrigation or other purposes.
Regular sanitization not only extends the lifespan of your barrels but also significantly reduces contamination risks, which is vital for any prepper’s water storage plan.
Selecting the Right Barrel for Water Storage
When selecting a barrel for water storage in your survival or prepping endeavors, it’s crucial to prioritize safety and functionality. Always choose food-grade barrels, which are marked with a food grade symbol, ensuring that they are safe for storing potable water. Opt for BPA-free materials to prevent harmful chemicals from leaching into your water supply, which is vital for long-term storage. A 55-gallon drum is a popular choice for emergency preparedness due to its significant capacity, making it an ideal option for stocking up.
Position your barrel in a cool, stable location to help maintain water quality, and ensure it has a secure lid to prevent any contamination. It’s also wise to label the barrel clearly as drinking water, along with the storage date, so you can easily track its freshness and rotation.
| Feature | Importance | Recommendation |
|---|---|---|
| Food Grade Symbol | Guarantees safety | Yes |
| BPA-Free Material | Prevents chemical leaching | Yes |
| Size | Capacity for storage | 55-gallon preferred |
Cleaning Supplies Needed for Sanitization
To effectively sanitize your water barrels for survival preparedness, you’ll need a few essential cleaning supplies that ensure thorough disinfection without leaving harmful residues.
Unscented bleach is a critical item; use a solution of 1/8 teaspoon per gallon of water, or approximately 1 ounce for a standard 55-gallon barrel. Alternatively, consider using hydrogen peroxide by applying 1 cup of a 3% solution to coat the surfaces.
For a more natural approach, mix vinegar and baking soda, allowing it to foam up before rinsing thoroughly.
Remember, maintaining your water storage is crucial for long-term survival, so don’t forget to include maintenance supplies like a broom for scrubbing, spray bottles for application, and hoses for rinsing.
This ensures that all cleaning agents are completely removed, keeping your water safe for consumption in times of need.
Step-by-Step Guide to Cleaning Water Barrels
Cleaning your water barrels is crucial for ensuring safe water storage, especially for those who prioritize survivalism and prepping.
Begin by emptying the barrels to evaluate the levels of dirt and debris that may have accumulated. Next, rinse the interiors with water to remove any loose particles.
Then, create a cleaning solution using household vinegar and baking soda, applying it generously and allowing it to sit for about 10 minutes to effectively break down any grime.
Following this, use a broom or scrub brush to thoroughly scrub all surfaces, ensuring you reach every corner for complete cleanliness.
Finally, rinse the barrels thoroughly with water to wash away any residues, and allow them to dry completely before storing or refilling.
Regular cleaning of your water barrels ensures that your water remains safe and ready for use in any survival situation.
Disinfecting Methods for Water Barrels
When it comes to prepping for emergencies, maintaining clean water barrels is crucial for ensuring you have access to safe drinking water. Understanding effective disinfecting methods can make a significant difference in your preparedness plan.
For sanitizing your barrels, a reliable option is using a 3% bleach solution—add 1/8 teaspoon per gallon, which amounts to about 1 ounce for a standard 55-gallon barrel. This method is straightforward and effective. Alternatively, you can use 1 cup of hydrogen peroxide for thorough disinfection, which is another excellent choice for ensuring your water is safe. If you prefer a more natural approach, a mixture of vinegar and baking soda can also be effective.
After applying any disinfectant, it’s essential to let the water sit for 24 hours. This waiting period allows any chlorine to dissipate, making the water safer for consumption.
| Method | Amount Needed |
|---|---|
| 3% Bleach | 1 ounce (55-gallon) |
| Hydrogen Peroxide | 1 cup |
| Vinegar + Baking Soda | As needed |
| Wait Time | 24 hours |
Long-Term Water Storage Guidelines
When it comes to long-term water storage for survivalism and prepping, selecting the right barrels is crucial to prevent chemical contamination that could compromise your water supply.
Ensure you employ proper sealing techniques to maintain water quality and minimize exposure to harmful contaminants.
Regular monitoring and maintenance of your stored water are essential practices that will help prolong the freshness and reliability of your emergency water reserves, keeping you prepared for any situation.
Choosing Appropriate Barrels
Selecting the right barrels for long-term water storage is crucial for ensuring the safety and quality of your drinking water in a survival situation. Always choose food-grade barrels with a food-grade symbol to guarantee safety for your stored water.
Opt for BPA-free options, such as the Augason Farms 55 Gallon Water Barrel, to prevent harmful chemical leaching that could compromise your water supply.
- Verify that the barrels have never been used for chemicals or hazardous materials.
- Store your barrels in a stable, cool environment to help maintain the quality of your water over time.
- Keep in mind that filled gallon drums can weigh over 400 pounds, so ensure you select a sturdy and supportive location for storage.
Maintaining Water Quality
Once you’ve chosen suitable barrels for water storage, the next critical step in your survival preparations is to maintain water quality over the long term.
Store your barrels in a cool, dark location to inhibit bacteria and algae growth, which can compromise your water supply. Ensure that they’re sealed tightly to prevent any contamination, and label each barrel with the storage date for easy reference.
To keep your stored water safe, regularly treat it with unscented household bleach, aiming for a chlorine concentration of around 6 ppm.
It’s essential to inspect and clean the barrels at least once a year; use a bleach solution or a mixture of vinegar and baking soda to effectively remove sediment and organic matter. This will help ensure that your water remains safe and clean for consumption, a vital aspect of your preparedness plan.
Proper Sealing Techniques
To ensure the longevity and safety of your water supply while prepping for emergencies, it’s essential to utilize proper sealing techniques for your barrels.
Begin by selecting food-grade, BPA-free barrels, and make sure they’re sealed tightly with a secure lid. This will prevent contamination from pests, debris, and potential pollutants.
- Clearly label each gallon container with the filling date and contents for easy identification during an emergency.
- Store barrels in a cool, dark location to maintain a stable temperature, which helps inhibit algae growth and keeps the water safe for consumption.
- Regularly inspect seals and lids for any signs of wear or damage, replacing them as necessary to maintain an effective barrier against contaminants that could compromise your water supply.
Maintenance Tips for Water Barrels
Maintaining water barrels is crucial for ensuring the purity and safety of your stored water, especially for survival and prepping scenarios. It’s advisable to clean and disinfect your barrels at least once a year to prevent contamination. Use a solution of 3 teaspoons of unscented bleach per gallon of water and allow it to sit for 30 minutes to effectively sanitize the interior. Regularly inspect the mesh screens for any signs of wear and replace them promptly to keep debris out. Store your barrels in a cool, stable location, away from direct sunlight and potential toxins to preserve the quality of the water. Additionally, conduct monthly checks on seals and lids to ensure they are secure and airtight.
| Maintenance Task | Frequency |
|---|---|
| Clean and disinfect | Annually |
| Inspect mesh screens | Regularly |
| Check seals and lids | Monthly |
| Replace worn screens | As needed |
| Store in stable location | Constantly |
Safe Practices for Using Stored Water
When utilizing stored water in a survival situation, prioritize non-foliar applications such as drip irrigation to minimize pathogen exposure to your edible plants.
Watering your vegetable garden in the morning allows the leaves to dry quickly, taking advantage of UV disinfection throughout the day.
Non-Foliar Applications Only
Using harvested rainwater for non-foliar applications, such as drip irrigation, is a crucial strategy for survivalists and preppers aiming to minimize pathogen exposure on edible plants.
By implementing these methods, you can enhance the safety and resilience of your garden while making effective use of rain barrels.
- Direct water to the roots to avoid contact with the leaves.
- Regularly disinfect your rain barrels to maintain water quality.
- Time your irrigation to optimize drying and leverage UV disinfection.
These practices not only reduce the risk of contaminants but also ensure that your vegetable garden remains productive and robust.
Prioritizing non-foliar applications is vital for maintaining a healthy garden while safely utilizing stored rainwater, ultimately supporting your self-sufficiency and preparedness goals.
Morning Watering Benefits
Watering your survival garden in the morning provides essential benefits, especially when using stored rainwater as part of your prepping strategy. This practice ensures that leaves dry quickly, minimizing the risk of fungal diseases that can threaten your food supply in damp conditions.
Morning watering also takes advantage of natural UV light, which can help disinfect your plants and reduce reliance on chemical treatments. By watering in the early hours, you ensure that your crops have adequate moisture before the heat of the day, which enhances hydration and nutrient uptake—crucial for promoting robust growth in a self-sufficient garden.
It’s important to avoid watering immediately after rain to prevent over-saturation, which can lead to root rot and other issues.
Utilizing stored rainwater not only aids in cultivating a resilient garden but also conserves precious drinking water resources, aligning with sustainable prepping practices. By incorporating these techniques into your survival gardening routine, you can ensure a more reliable food source in times of uncertainty.
Drip Irrigation Usage
Drip irrigation is an essential technique for effectively utilizing stored rainwater in your vegetable gardens, especially for those focused on survivalism and prepping. This method not only conserves water but also minimizes direct contact with edible plant parts, thereby reducing the risk of pathogen exposure.
To ensure safe and effective practices, keep these key considerations in mind:
- Water early in the morning to enhance leaf drying and take advantage of natural UV disinfection, which is crucial for maintaining healthy crops.
- Direct watering at the soil level rather than on the foliage helps limit contamination and ensures that your plants receive the moisture they need without unnecessary risks.
- Regularly clean your drip irrigation system with soap and water to prevent blockages, ensuring that your water supply remains consistent and reliable in times of need.